Automated Crimp Tool Inspection
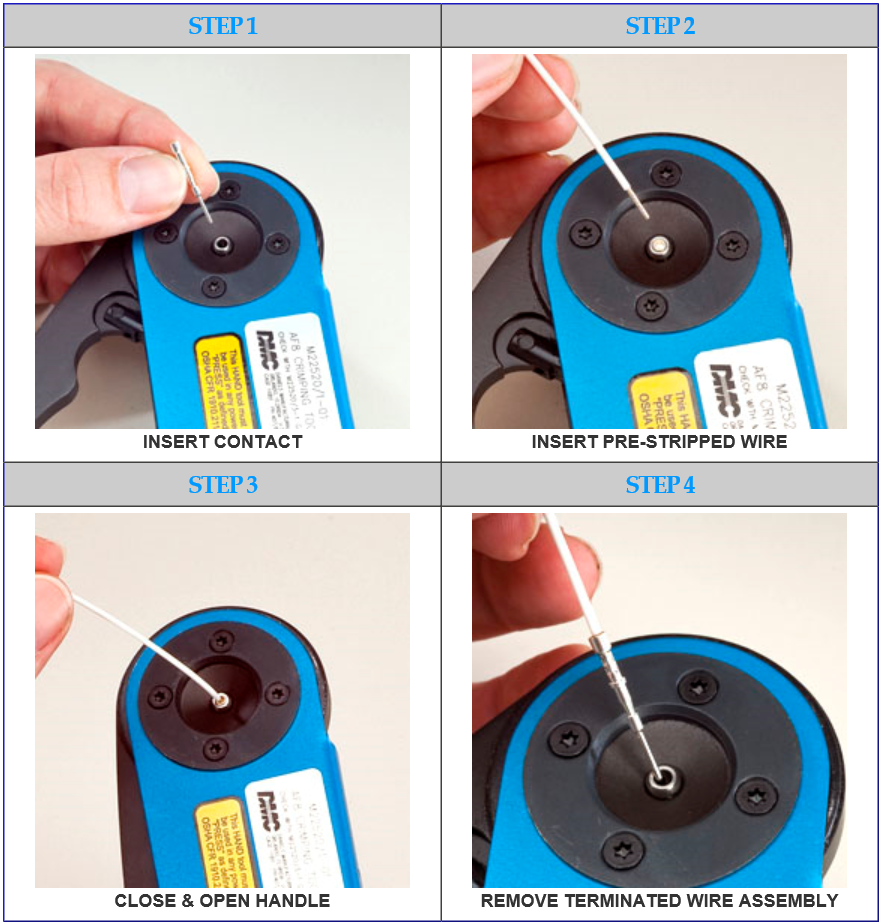
A common tool used when assembling custom cables, is a crimper. A crimper, crimps or binds a wire to a connector pin. It does this by effectively squeezing the metal base of a pin to a wire. If you are not familiar with this process, the image below shows the steps necessary to crimp a pin.
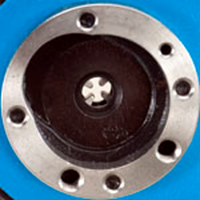
The part of the tool that actually presses against the pins are 4 small blades, as shown in the next photo. The amount the blades moved toward the center, when closing the tool, would determine how much pressure was applied to the pin. The amount of squeezing is critical. Too much and you can break the pin, too little, and the wire won’t bind to the pin and can easily fall back out. For high reliability applications, its is often customary to crimp a test pin every day to ensure that the crimper is functioning properly, and subsequently measure how much force is required to pull the wire from the pin. Every technician would perform this task every day, and although it only took a few minutes to perform the test, a faster way to determine if the crimper was good was desired.
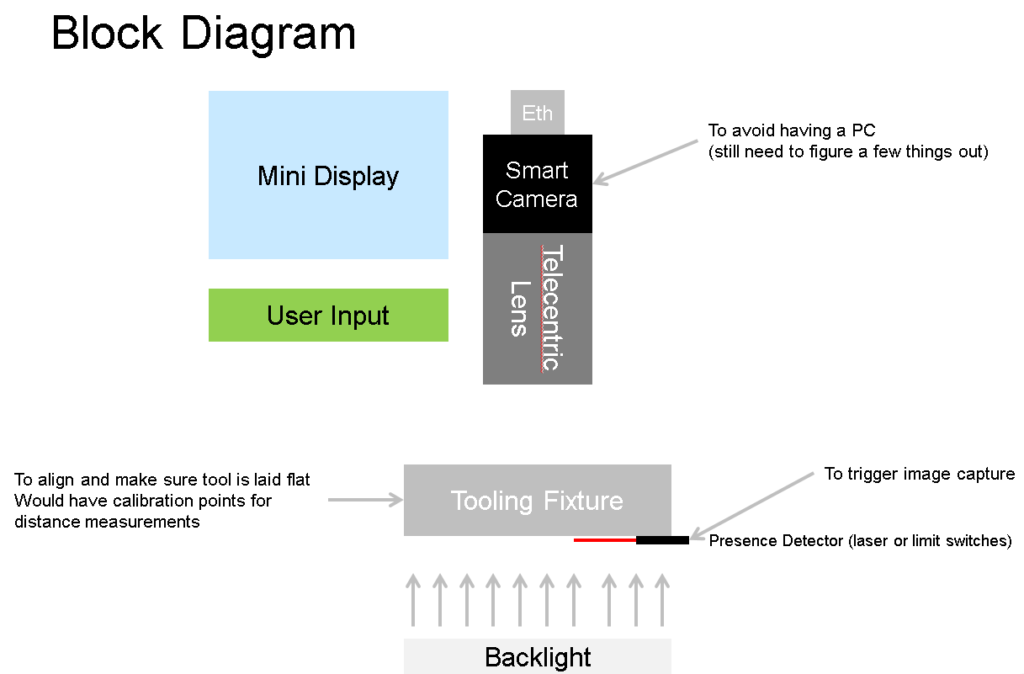
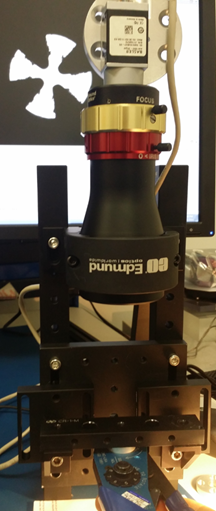
The solution I came up with involved using a telecentric lense to measure the distance between the blades of the crimper and thereby determine if the crimper was adjusted properly. Once the fixture detected that a crimp tool was present it would automatically snap a picture of the crimper and verify its blades were at the appropriate distance. Below is the initial block diagram proposing the idea.
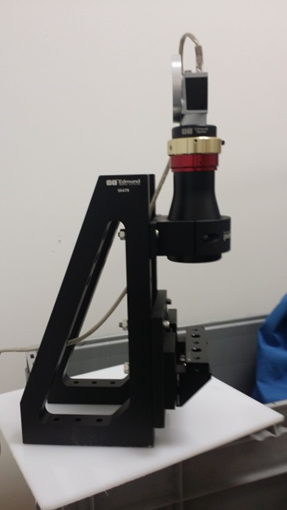
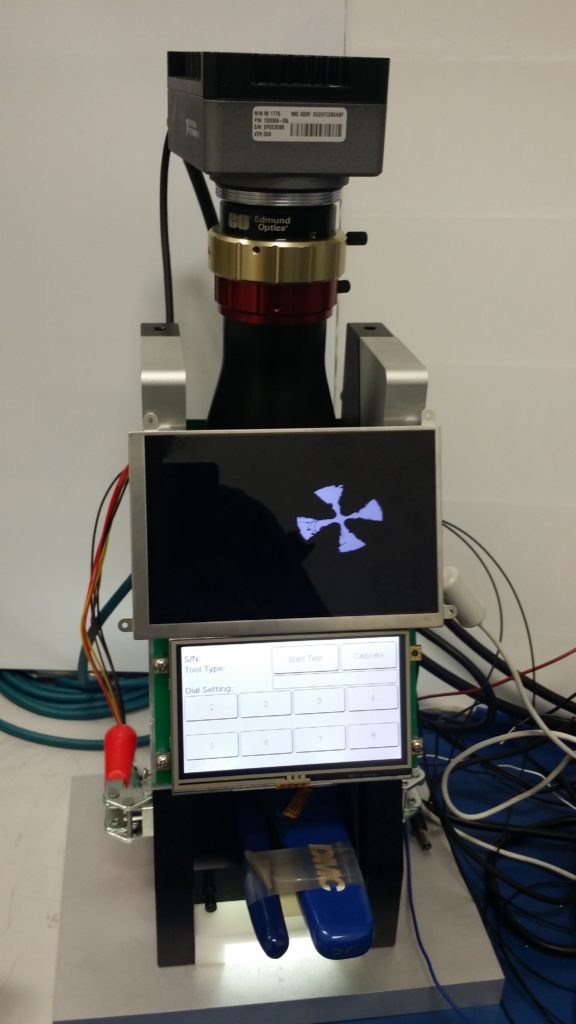
Here are pictures of the initial prototype that was constructed.
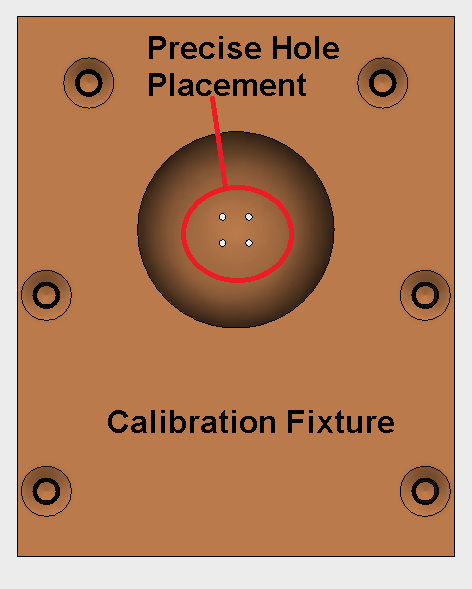
With the light behind the tool, the resulting image is mostly black and white. To determine how much a pin will be pressed, you need to find the diameter of the largest circle that will fit within the 4 blades. There would be some calibration symbols on the fixture, in the camera field of view, to help determine the actual distance each pixel represents. 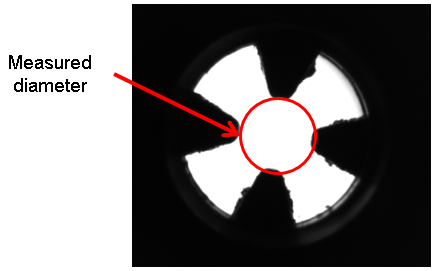
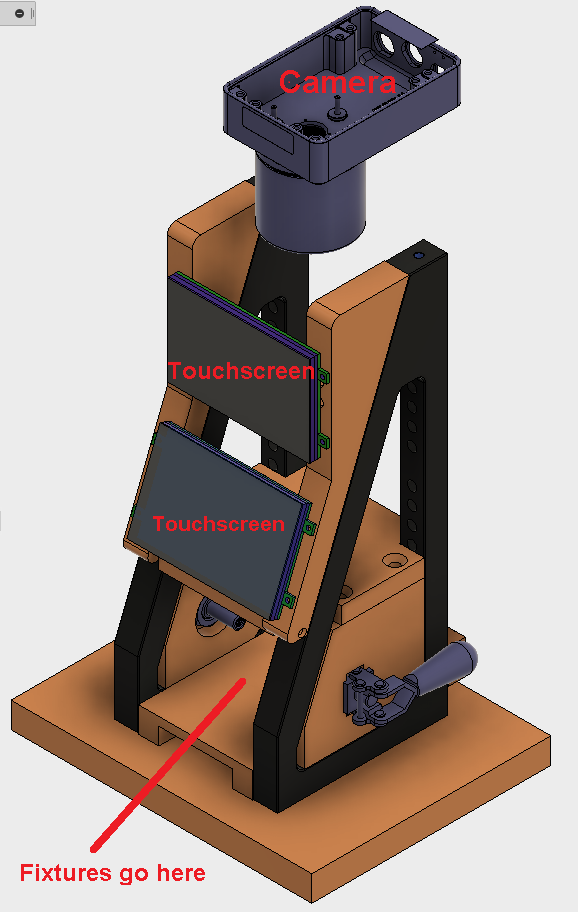
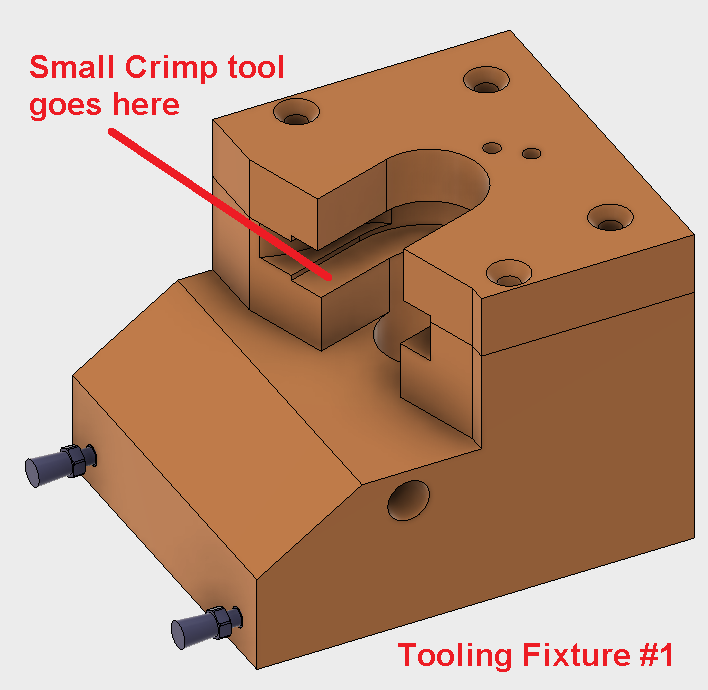
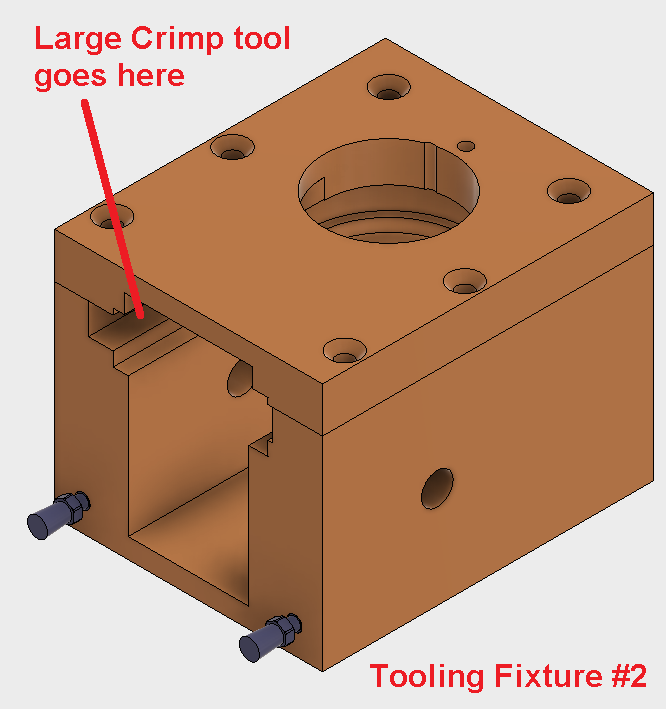
The next step in the design process was to create a more robust version. Below are 3D models that I created, from which we manufactured the necessary custom parts. This included tooling fixtures that could hold the crimp tool in the best position to be able to characterize the crimp blades.
Comments are disabled